Description
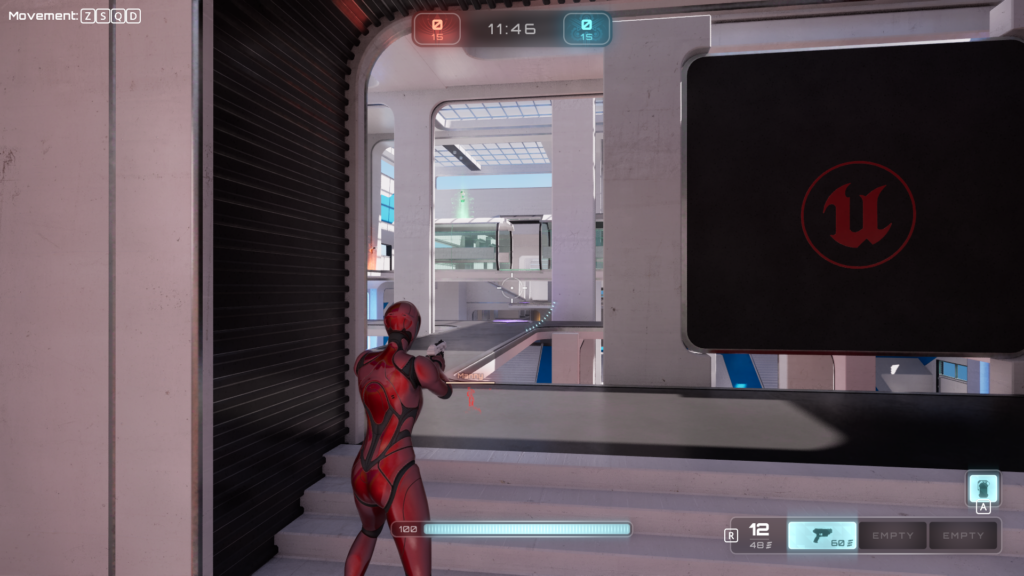
Keyboard Layout-Independent Input (KiBLII for short) extends Unreal Engine 4/5 with effortless support for all keyboard layouts that are available on Windows. When you enable the KiBLII plugin, all the key bindings react to the same physical keys combination, regardless of the keyboard layout. This works for both the game and the editor and does not interfere with text input.
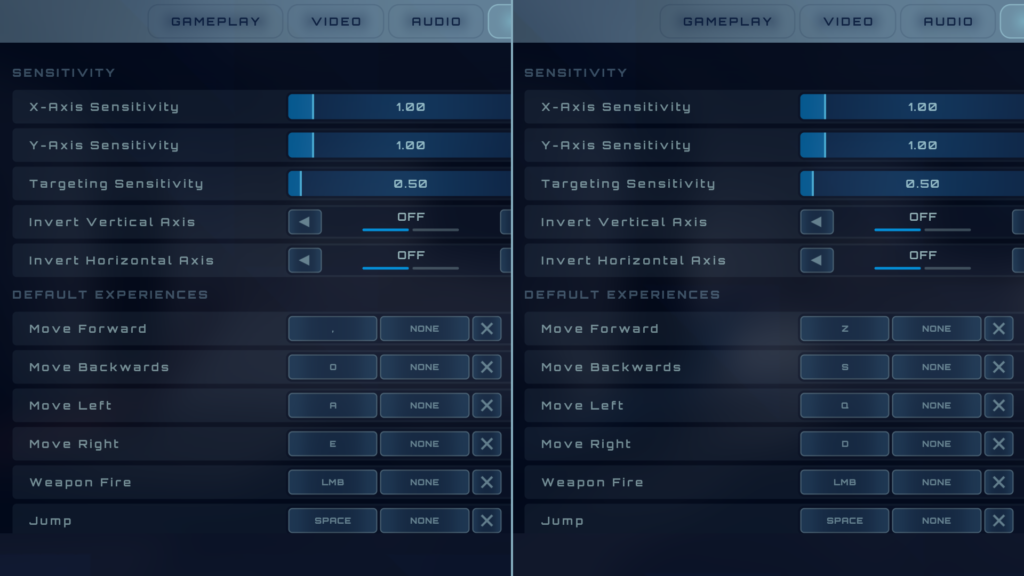
You can welcome players into your game with input bindings tailored for their keyboard with almost no additional work on your end. You can code your game with your fancy mechanical DVORAK keyboard while keeping standard WSAD bindings that your players will use.
Features
- Automatic translation of all key events to standard US QWERTY keyboard layout.
- Compatible with the Enhanced Input.
- CommonUI integration, including automatic key icons generation.
- Text input using system keyboard layout, be it DVORAK, AZERTY or something entirely different.
- Blueprint functions to translate keys from QWERTY back to the system keyboard layout.
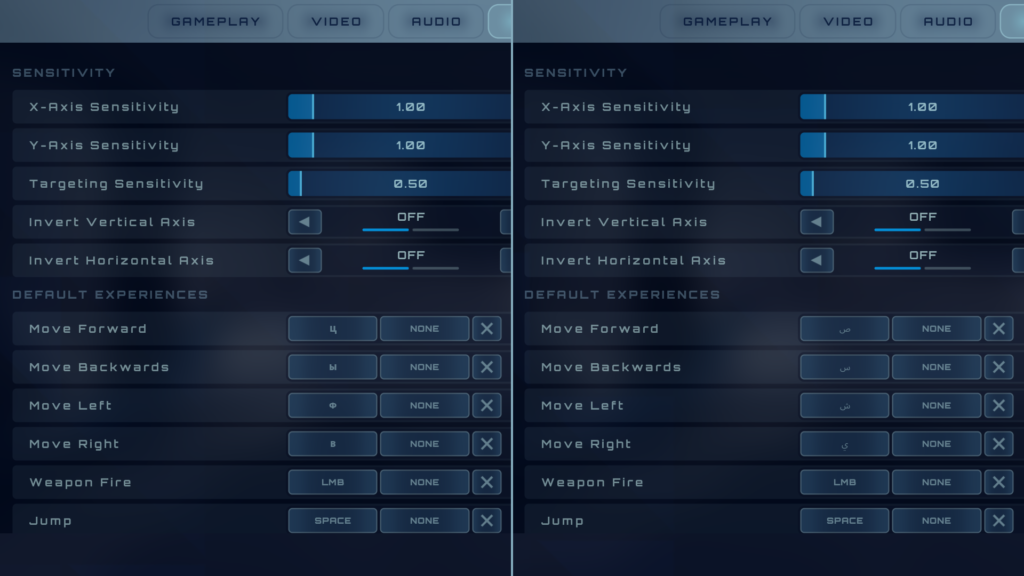
- Customized InputKeySelector widget, that displays bound keys using their true character.
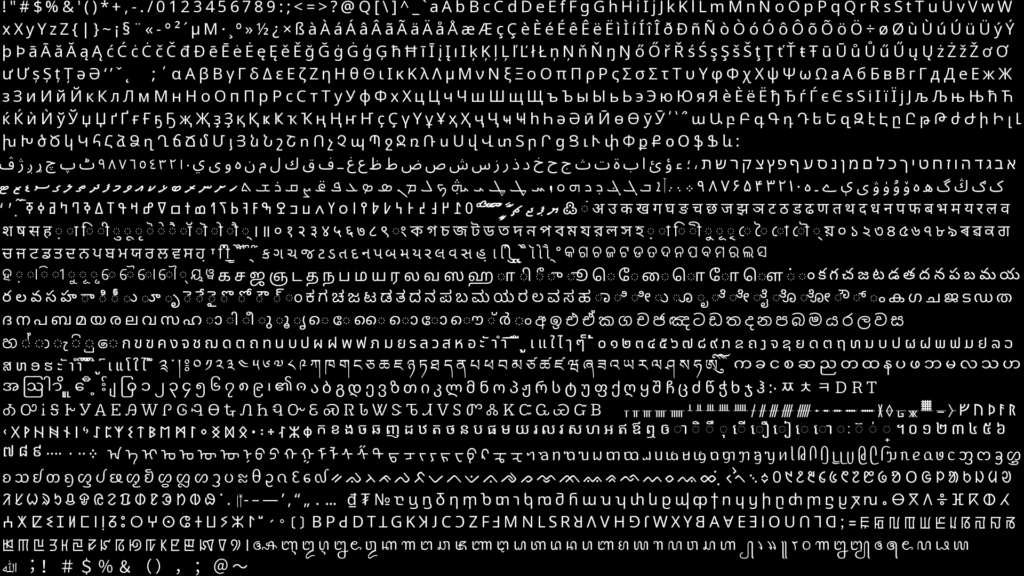
- Font asset containing over 1600 characters needed to display keys from all standard Windows keyboard layouts.
- Input translation works only on Windows. Linux and MacOS are supported so no special considerations are required while porting.
- Will not work with PixelStreaming.
Gallery
Tutorials
Downloads
Lyra Example project (UE 5.4):
- executable (win64)
- project (5.4 or later)
First Person Example project (UE 4.27):
- executable (win64)
- project (4.27 or later)
Changelog
1.4
- CommonUI integration
- Customized CommonInputBaseControllerData with UMG widget based key icons generation
1.3
- Update for UE 5.0 EA and git branches: 5.0, UE5-main
1.2
- Fixed potential bug in ToUnicode function usage
1.1
- Fixed handling of gamepad
- Fixed 4.25 issue with switching keyboard layout during gameplay
- Fixed handling of dead-keys
Documentation
Basic Usage
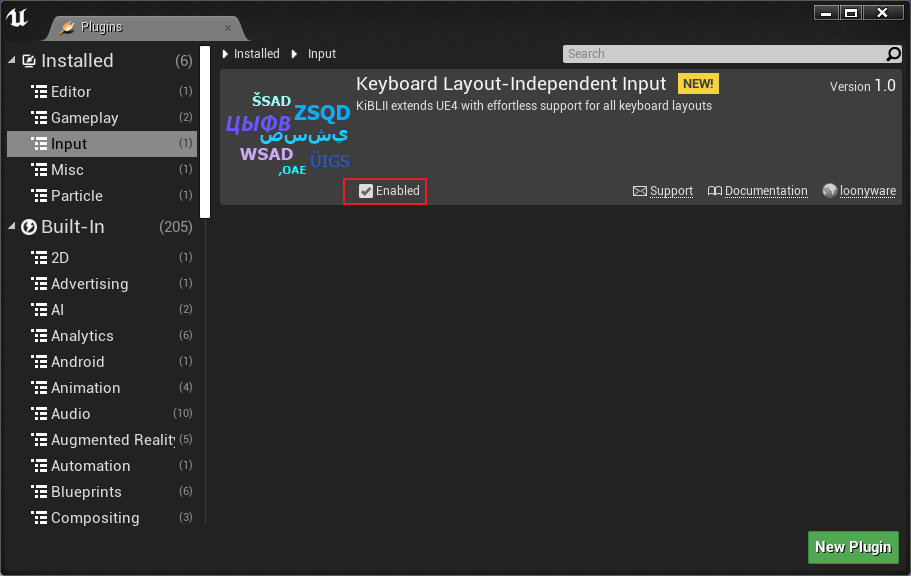
To use KiBLII plugin, you have to enable it first:
- Open ‘Plugins’ window. You can do this through ‘Edit’ menu in the menu bar.
- In the navigation panel, on the right side of the window, select ‘Input’ group from ‘Installed’ section.
- In the list of plugins, on the left side of the window, find ‘Keyboard Layout-Independent Input’ plugin.
- Make sure that the plugin is marked as ‘Enabled’. You will have to restart the editor for this change to take effect.
You can now use a keyboard with any layout and all key bindings in the editor and in the game will see your keyboard as a standard US QWERTY keyboard. For example, the standard ‘WSAD’ movement bindings will be triggered by keys that are in the same physical positions on your keyboard as on QWERTY keyboard (e.g. ‘ZSQD’ on AZERTY and ‘,OAU’ on DVORAK).
This will not interfere with text input, only with key bindings.
Settings
The KiBLII plugin can be active in editor and/or in game builds of UE project. By default it’s enabled in both, but you can change it in the project settings.
- Open ‘Project Settings’ window. You can do this through the ‘Edit’ menu in the menu bar.
- In the navigation panel, on the right side of the window, scroll all the way down to the ‘Plugins’ category and click on the ‘KiBLII’ section.
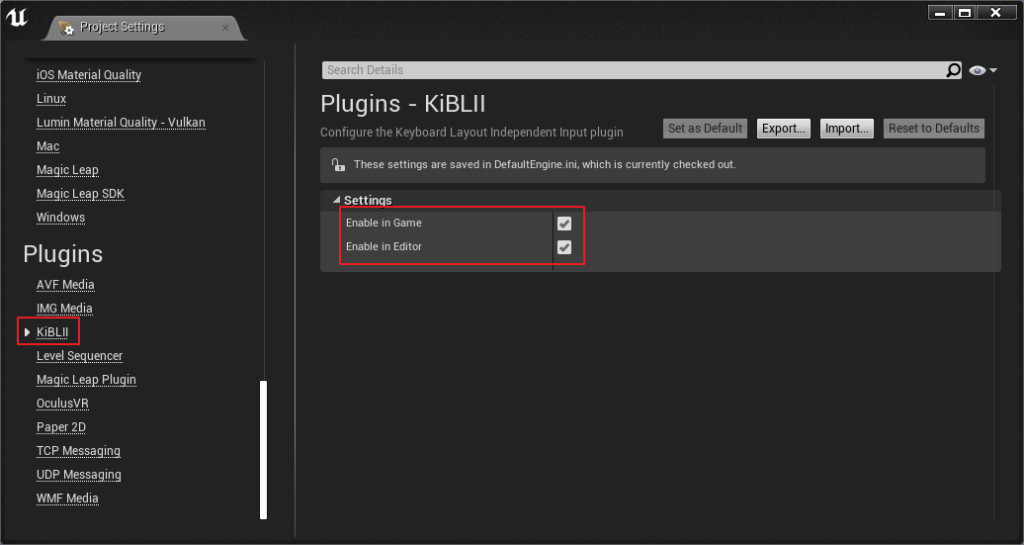
‘Enable in Game’ enables the plugin in non-editor builds. This option has no effect on PIE.
‘Enable in Editor’ enables the plugin in editor builds. This means that the KiBLII plugin will be active in the entire UE editor, including in-editor key bindings and PIE.
Both options require the engine to be restarted.
Input Mappings
Input Settings
When using KiBLII plugin, you should set input mappings as you would for standard US QWERTY keyboard. That is, for example, ‘WSAD’ keys for basic movement. The plugin will handle input translation under the hood.
You can learn more about input mappings in UE documentation about Input.
In-game Rebinding
If you want to allow your player to rebind input in-game, you can use KiBLIIInputKeySelector widget. It works exactly the same as UE InputKeySelector widget with the difference that it displays system layout instead of QWERTY layout key representation.
For more modern solution you can copy what Epic did in Lyra Starter Game. Only two one-line code changes are needed:
- Source/LyraGame/Settings/Widgets/LyraSettingsListEntrySetting_KeyboardInput.cpp : 94
Args.Add(TEXT("InKey"), UKiBLIIFunctionLibrary::RemapKey_QwertyToSystem(InKey).GetDisplayName()); - Source/LyraGame/Settings/CustomSettings/LyraSettingKeyboardInput.cpp : 150
return UKiBLIIFunctionLibrary::RemapKey_QwertyToSystem(Mapping.GetCurrentKey()).GetDisplayName();
Don’t forget to #include "KiBLIIFunctionLibrary.h" in both cases.
Input Display (CommonUI)
When using CommonUI plugin, you can easily display input using UCommonActionWidget. You can integrate KiBLII into this by changing the parent class of your Controller Data blueprint, used for Mouse and Keyboard input type, to UKiBLIICommonInputBaseControllerData.
- Open your Controller Data blueprint.
- Select Class Settings view.
- From the Parent Class dropdown choose
UKiBLIICommonInputBaseControllerData(you can start typing ‘KiBLII’ to ease the search).

Besides handling the translation between underlaying QWERTY mapping and System Keyboard Layout, UKiBLIICommonInputBaseControllerData can also dynamically generate key icons. Thanks to this you can have input hints working with any keyboard layout and any input mapping without preparing all possible key icons beforehand. To set it up you’ll need to:
- Open your Controller Data blueprint.
- Select Class Default view.
- From Keys Widget dropdown choose an implementation of
UKiBLIIKeysWidgetto generate key icons from.

There’s a UKiBLIIKeysWidget implementation already provided with the plugin: WBP_KiBLIIKeys. It is consistent with the UI used in Lyra, and can handle up to four keys (e.g. for displaying movement inputs). Use it as a base for your own implementation.
Input Display (Old)
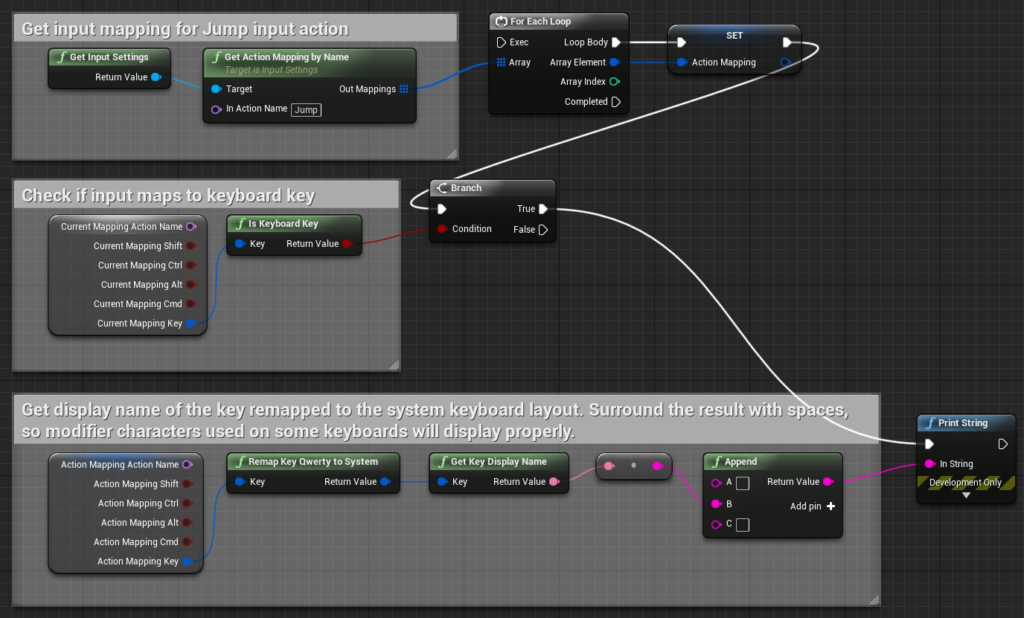
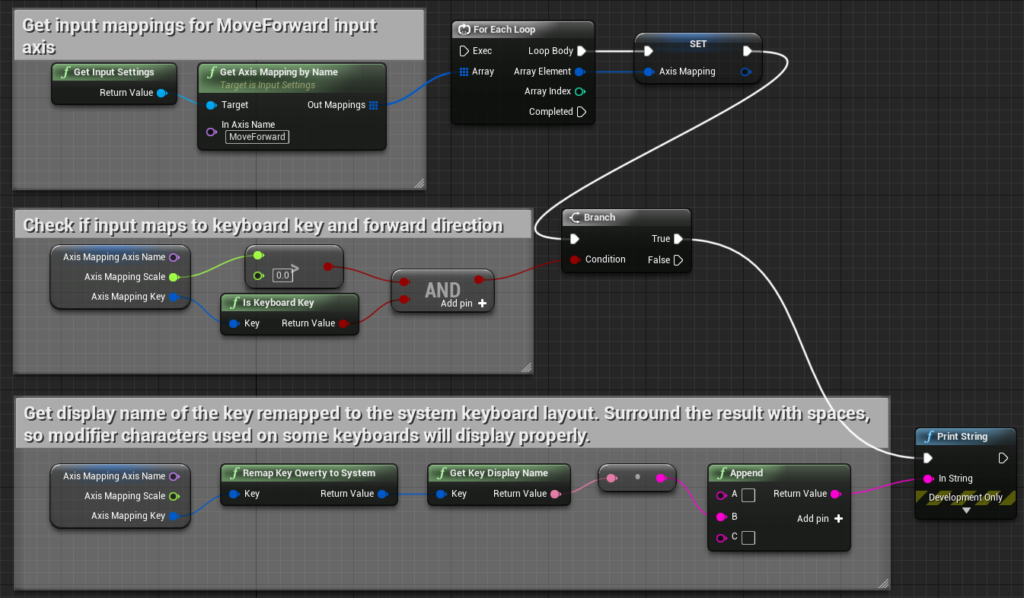
If you want to display your input mappings, you can retrieve them from ‘Input Settings’ object. Before displaying them, you have to remap them from QWERTY to the system keyboard layout. You can do it using ‘Remap Key Qwerty to System’ function from KiBLII Functions Library. Here are example blueprint scripts you can use to display your action and axis input mappings:
Font
When displaying input mappings, you should remember that they can include many unicode characters that can be missing from regular fonts. The KiBLII plugin provides a font for this purpose: KiBLIINotoSansFont. This asset uses Noto Sans font and is configured to handle over 1600 unicode characters, which covers all characters used by standard Windows keyboard layouts.
Additional Features
Font Test Function
KiBLII Functions Library provides ‘Get Keyboard Layouts Chars’ function, which returns a string that contains all the characters that can appear in standard Windows keyboard layouts. You can use this string to test a font that you would like to use to display input mappings.
